Get Started
Hyperlane can be deployed by anyone to any chain. This guide covers sending your first interchain message from a new EVM chain. By the end of this guide you will have deployed and configured your Mailbox smart contract and off-chain agents, allowing developers to send interchain messages to and from your chain.
Terminology
The "local chain" is your new chain that you want to deploy Hyperlane onto.
A "remote chain" is a chain with an existing Hyperlane deployment that you want your local chain to send & receive messages to & from.
Overview
There are five steps in this guide:
- Set up keys that you will use to deploy contracts and run validators and relayers.
- Deploy contracts to the local chain and to every remote chain with which the local chain will be able to send and receive messages.
- Run validators and relayers using Kurtosis. Validators provide the signatures needed for the Interchain Security Modules you deployed in step 2 and relayers send and receive messages between chains you deployed contracts to in step 2.
- Send a test message to confirm that your relayer is able to deliver messages to and from each pair of chains
- Deploy a warp route to send token value, not just messages, across chains
Getting Started
1. Set up keys
There are three keys you must set up and fund. To get started, you can simplify by using the same hexadecimal key for all three roles.
| Key Role | Description | Funding Needs |
|---|---|---|
| Contract Deployer | 32 byte hexadecimal private key | Funded on all the chains on which we need to deploy contracts. |
| Validator Accounts | A list of validator addresses that will sign outbound messages from your local chain. Just one validator works to get started quickly. | A small amount so validators can announce the location of their signatures onchain with a one-time transaction |
| Relayer Accounts | The single relayer you will operate requires an account on each chain it will deliver messages to & from | The relayer must have a balance on all chains it's relaying between. |
For instructions on how to generate keys, see the agent keys section. Your deployer key must be a hexadecimal key, while validator and relayer keys can be hexadecimal or AWS KMS.
If deploying on a local network using Foundry's Anvil, use the following command to fund your newly-generated account. It uses one of the pre-funded private keys to transfer 1 ETH to the address in the $YOUR_TARGET_ADDRESS environment variable.
cast send $YOUR_TARGET_ADDRESS \
--private-key 0xac0974bec39a17e36ba4a6b4d238ff944bacb478cbed5efcae784d7bf4f2ff80 \
--value $(cast tw 1)
2. Deploy contracts
Once you have set up deployer, validator, and relayer keys it's time to use the Hyperlane CLI to deploy smart contracts to the local and remote chains.
On the local chain, we will deploy:
- The core contracts, including a Mailbox that can be used to send and receive messages
On all chains, we will deploy:
- A Multisig ISM that can be used to verify inbound messages from the other local & remote chains
- An
InterchainGasPaymaster, which can be used to pay our relayer for delivering interchain messages - A
TestRecipient, which we will send messages to, in order to test that everything is working correctly
Setup
First, install the Hyperlane CLI from NPM. Node 16 or newer is required. The following command will install it globally on your machine. See the package page for alternatives such as temporary install or building from source.
npm install -g @hyperlane-xyz/cli
Next, determine what custom chain configs you will need for your local and remote chains. Any chains that are already included in the Hyperlane SDK won't need a chain config (but can optionally have one if you want to override default settings). Run the following to see the default SDK chains:
hyperlane chains list
You can press space to select your chains. For any chains that need custom configs, you can define them manually using JSON or YAML (see example config), or create them with the following command:
hyperlane config create chain
Now the CLI will know how to interact with all your chains, but it will also need to know how to configure your Interchain Security Module (ISM).
Note, currently only Multisig-based ISMs are supported by the CLI. More complex ISMs will require manual deployments.
To create a multisig ISM configs, you can define it manually using JSON or YAML (see example config here), or create it with the following command:
hyperlane config create multisig
When asked about the multisig type, choose message id ism. In the context of this guide, we will be using a 1/1 multisig, so choose a threshold of 1 and enter the address of your key.
Deploy
We're now ready to use the deploy core command to deploy the Hyperlane contracts. To pay for transactions, the command will need the contract deployer key from step 1, which can be provided via the HYP_KEY env variable or as a command argument.
hyperlane deploy core \
    --targets chain1,chain2,... \ # all the chains you want to bridge between
    --chains $CHAIN_CONFIG_FILE \  # chain configuration
    --artifacts $PREDEPLOYED_ARTIFACT_FILE \ # in case, you already have predeployed some of the contracts and want to reuse them
    --ism $MULTISIG_CONFIG_FILE \ #
    --out $OUT_DIR \
    --key $YOUR_DEPLOYER_PRIVATE_KEY
Verify
Deployment contract artifacts will be written to to the artifacts/ folder by default. The deployer will create two timestamped files, agent-config-{timestamp}.json and core-deployment-{timestamp}.json
The core-deployment file contains the addresses of core contracts, organized by chain.
The agent-config file contains the data needed to run Hyperlane agents for the next step.
3. Run validators and relayers
We've partnered with Kurtosis to provide a single-click validator and relayer deployment in the cloud. You'll receive a one-month trial during which your validator and relayer run in Kurtosis Cloud for free. After your trial ends, you'll need to either run your validator and relayer yourself or purchase a Kurtosis Cloud subscription.
To get started, use the deploy kurtosis-agents command to generate a link for configuring your Kurtosis deployment.
hyperlane deploy kurtosis-agents
Follow the prompts and then click on the Kurtosis Cloud link output by the command.
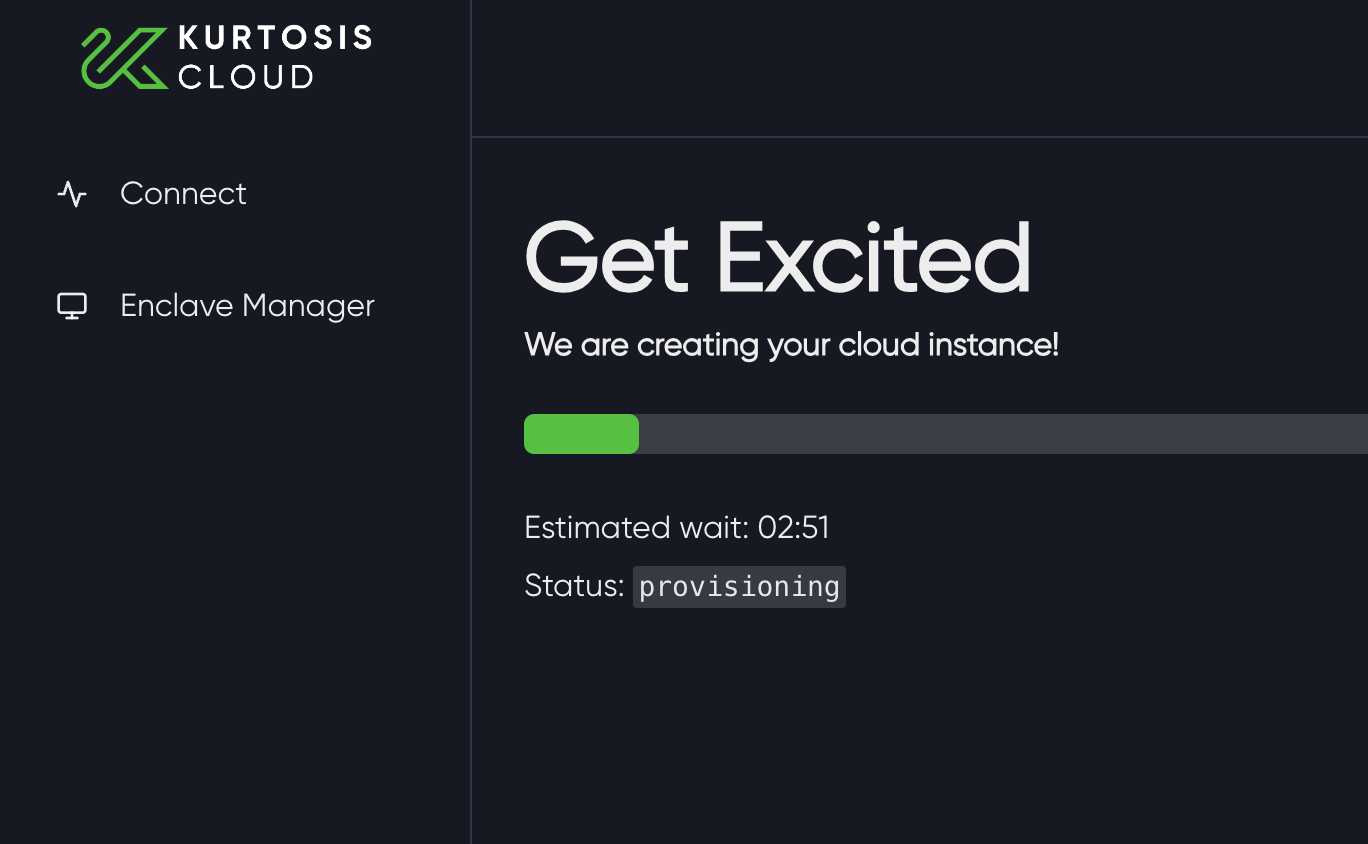
If this is your first time using Kurtosis Cloud, you'll need to sign in with Google and Kurtosis will provision a remote cloud instance for your validator and relayer in roughly 2 minutes.
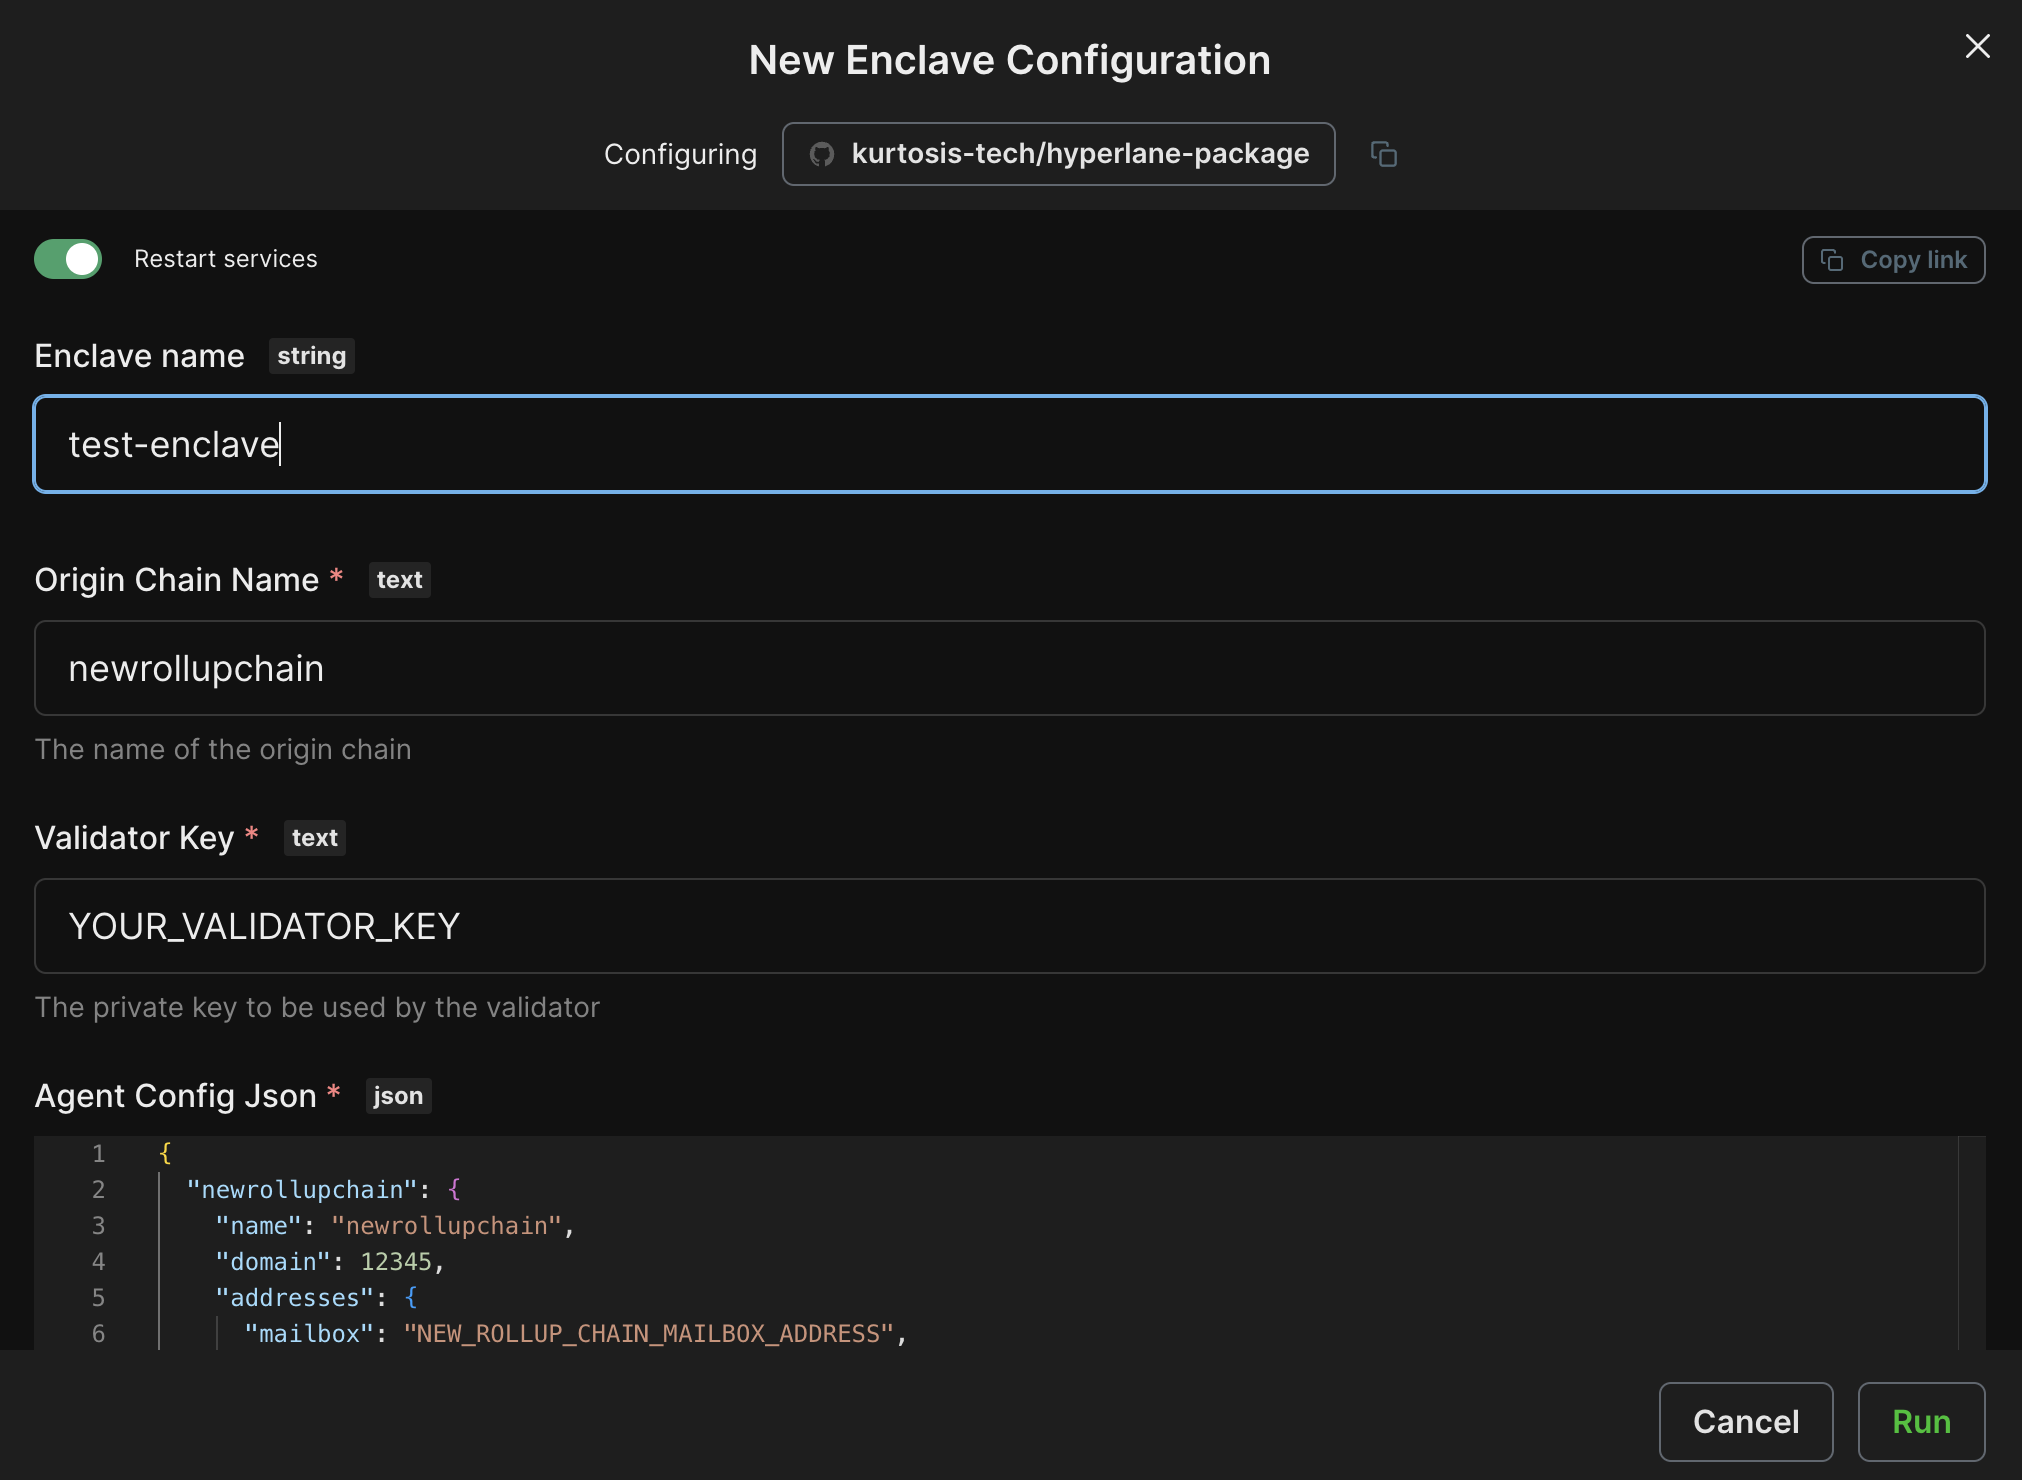
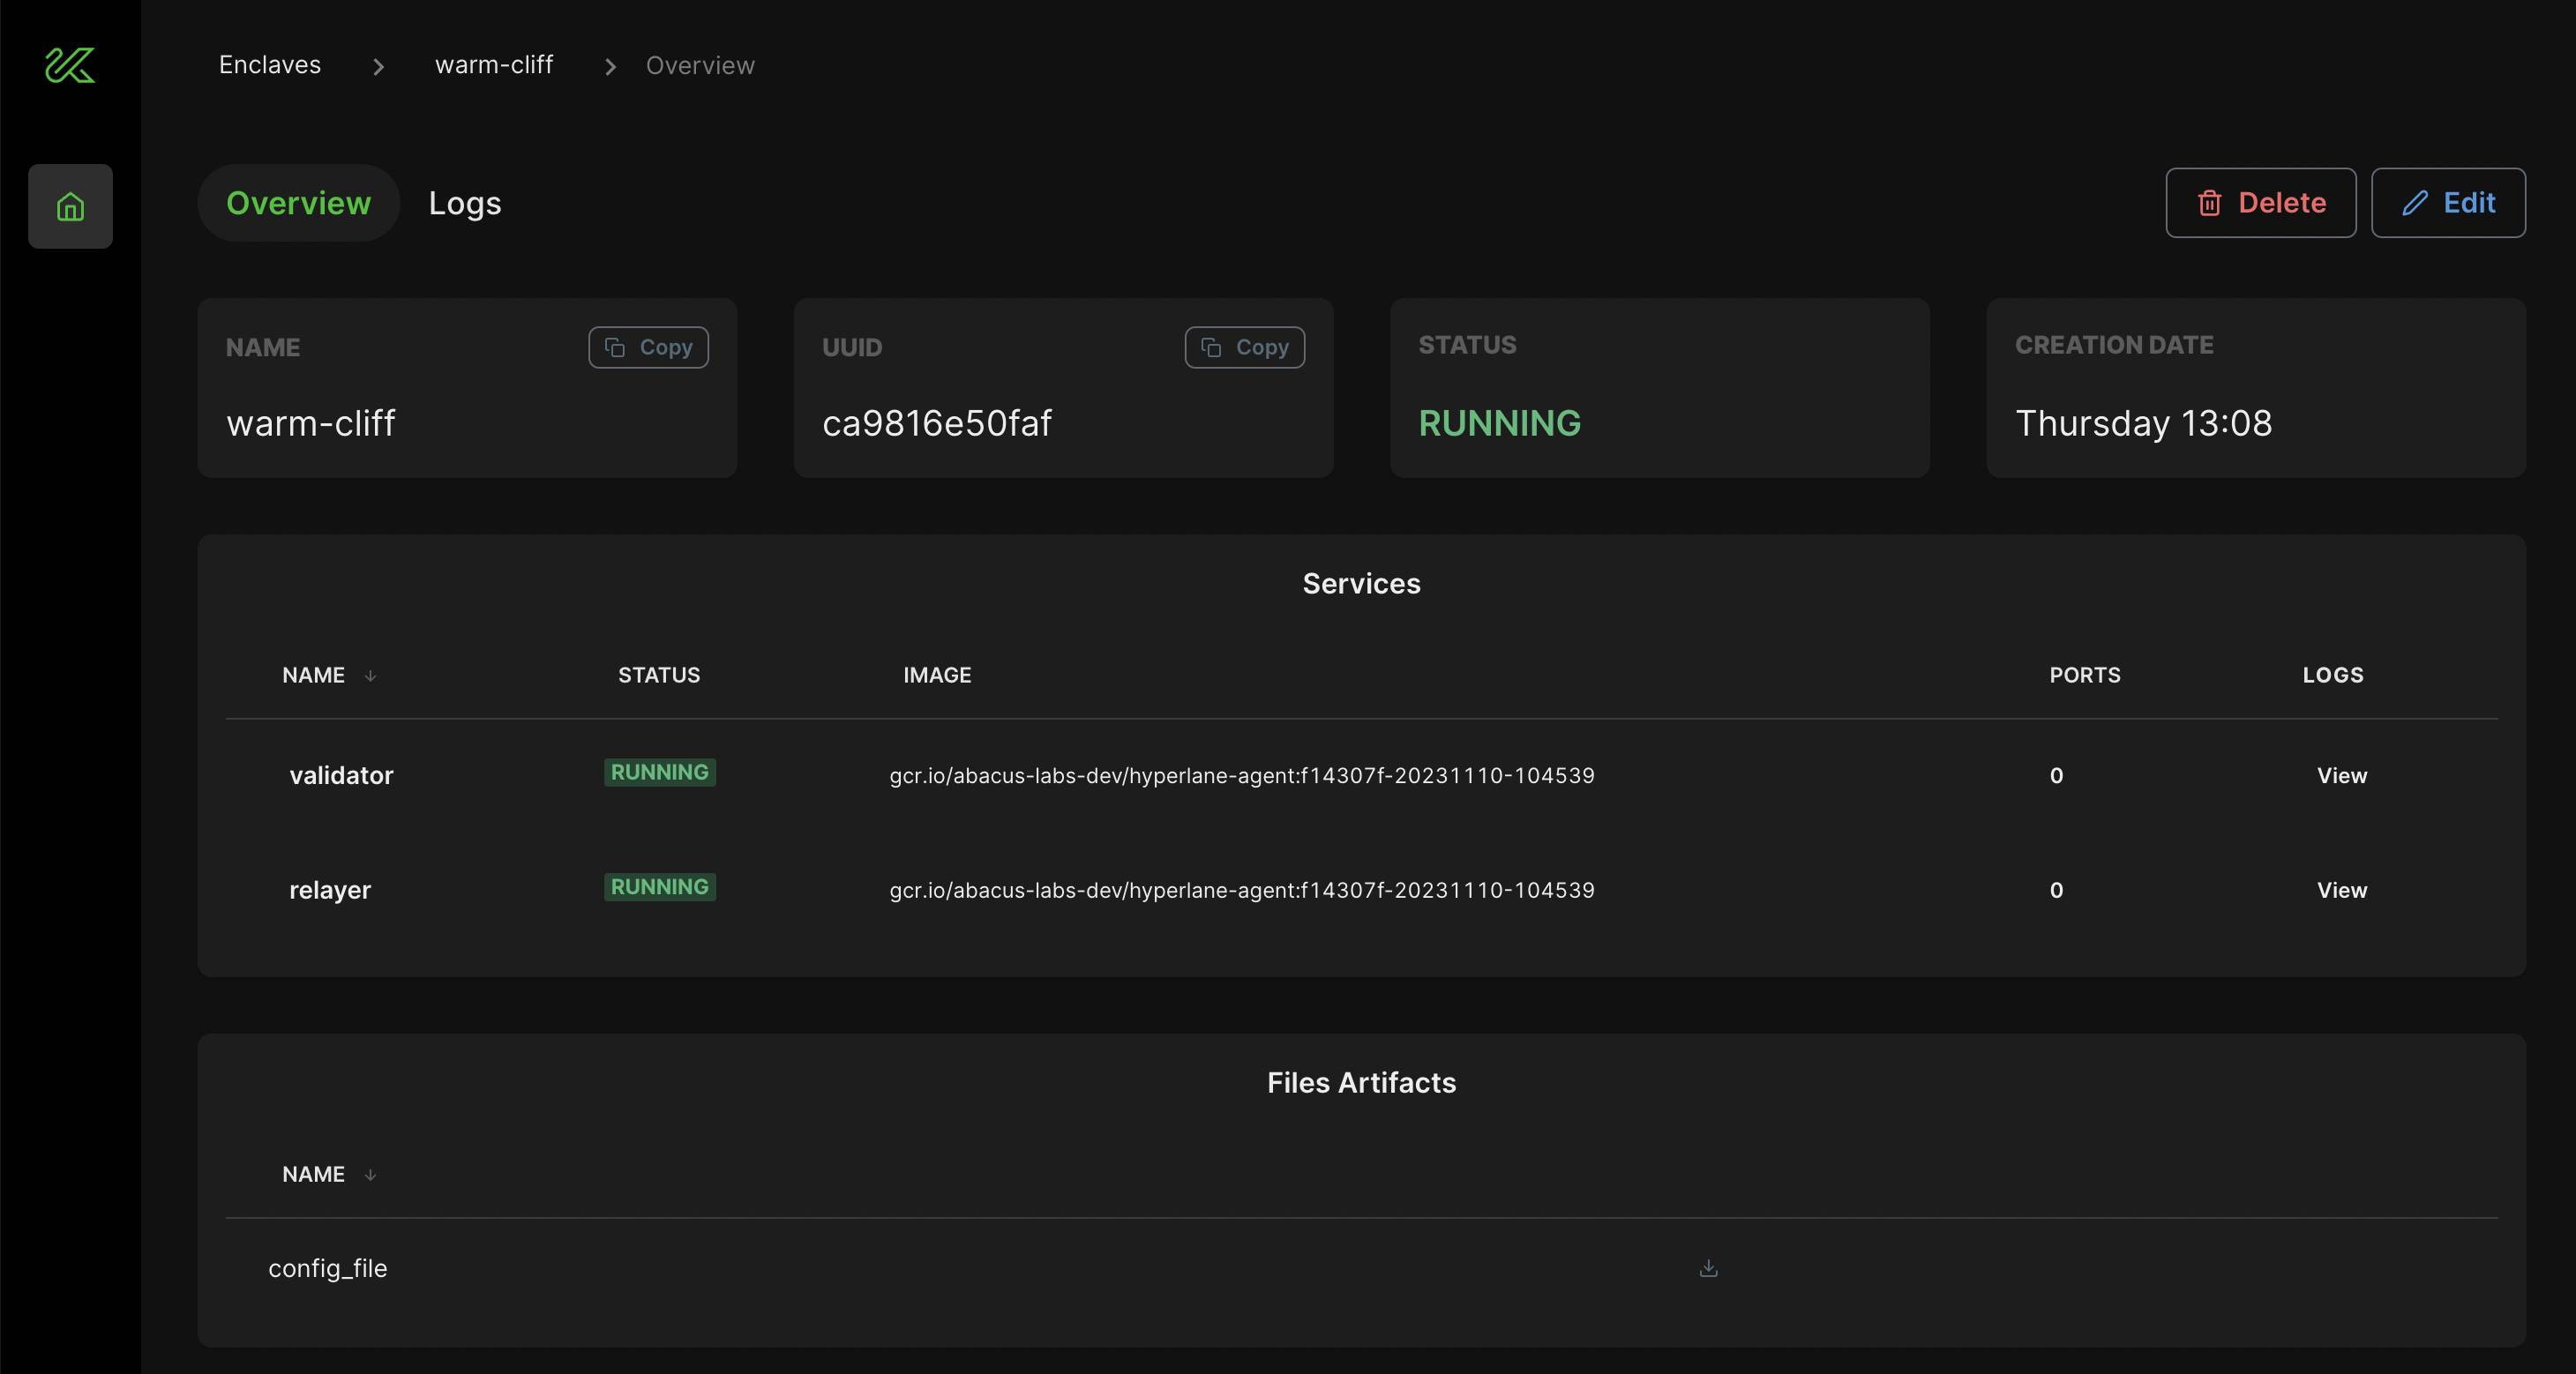
A prefilled configuration screen will pop up with all your relayer and validator information from Steps 1 and 2. The last step will be to input your Validator Key from Step 2. The screenshot below shows an example prefilled configuration.
The Kurtosis team is still building the secrets functionality of Kurtosis Cloud, so for now do not enter any sensitive information (e.g. your private keys) into Kurtosis! Only testing and non-sensitive values should be used.
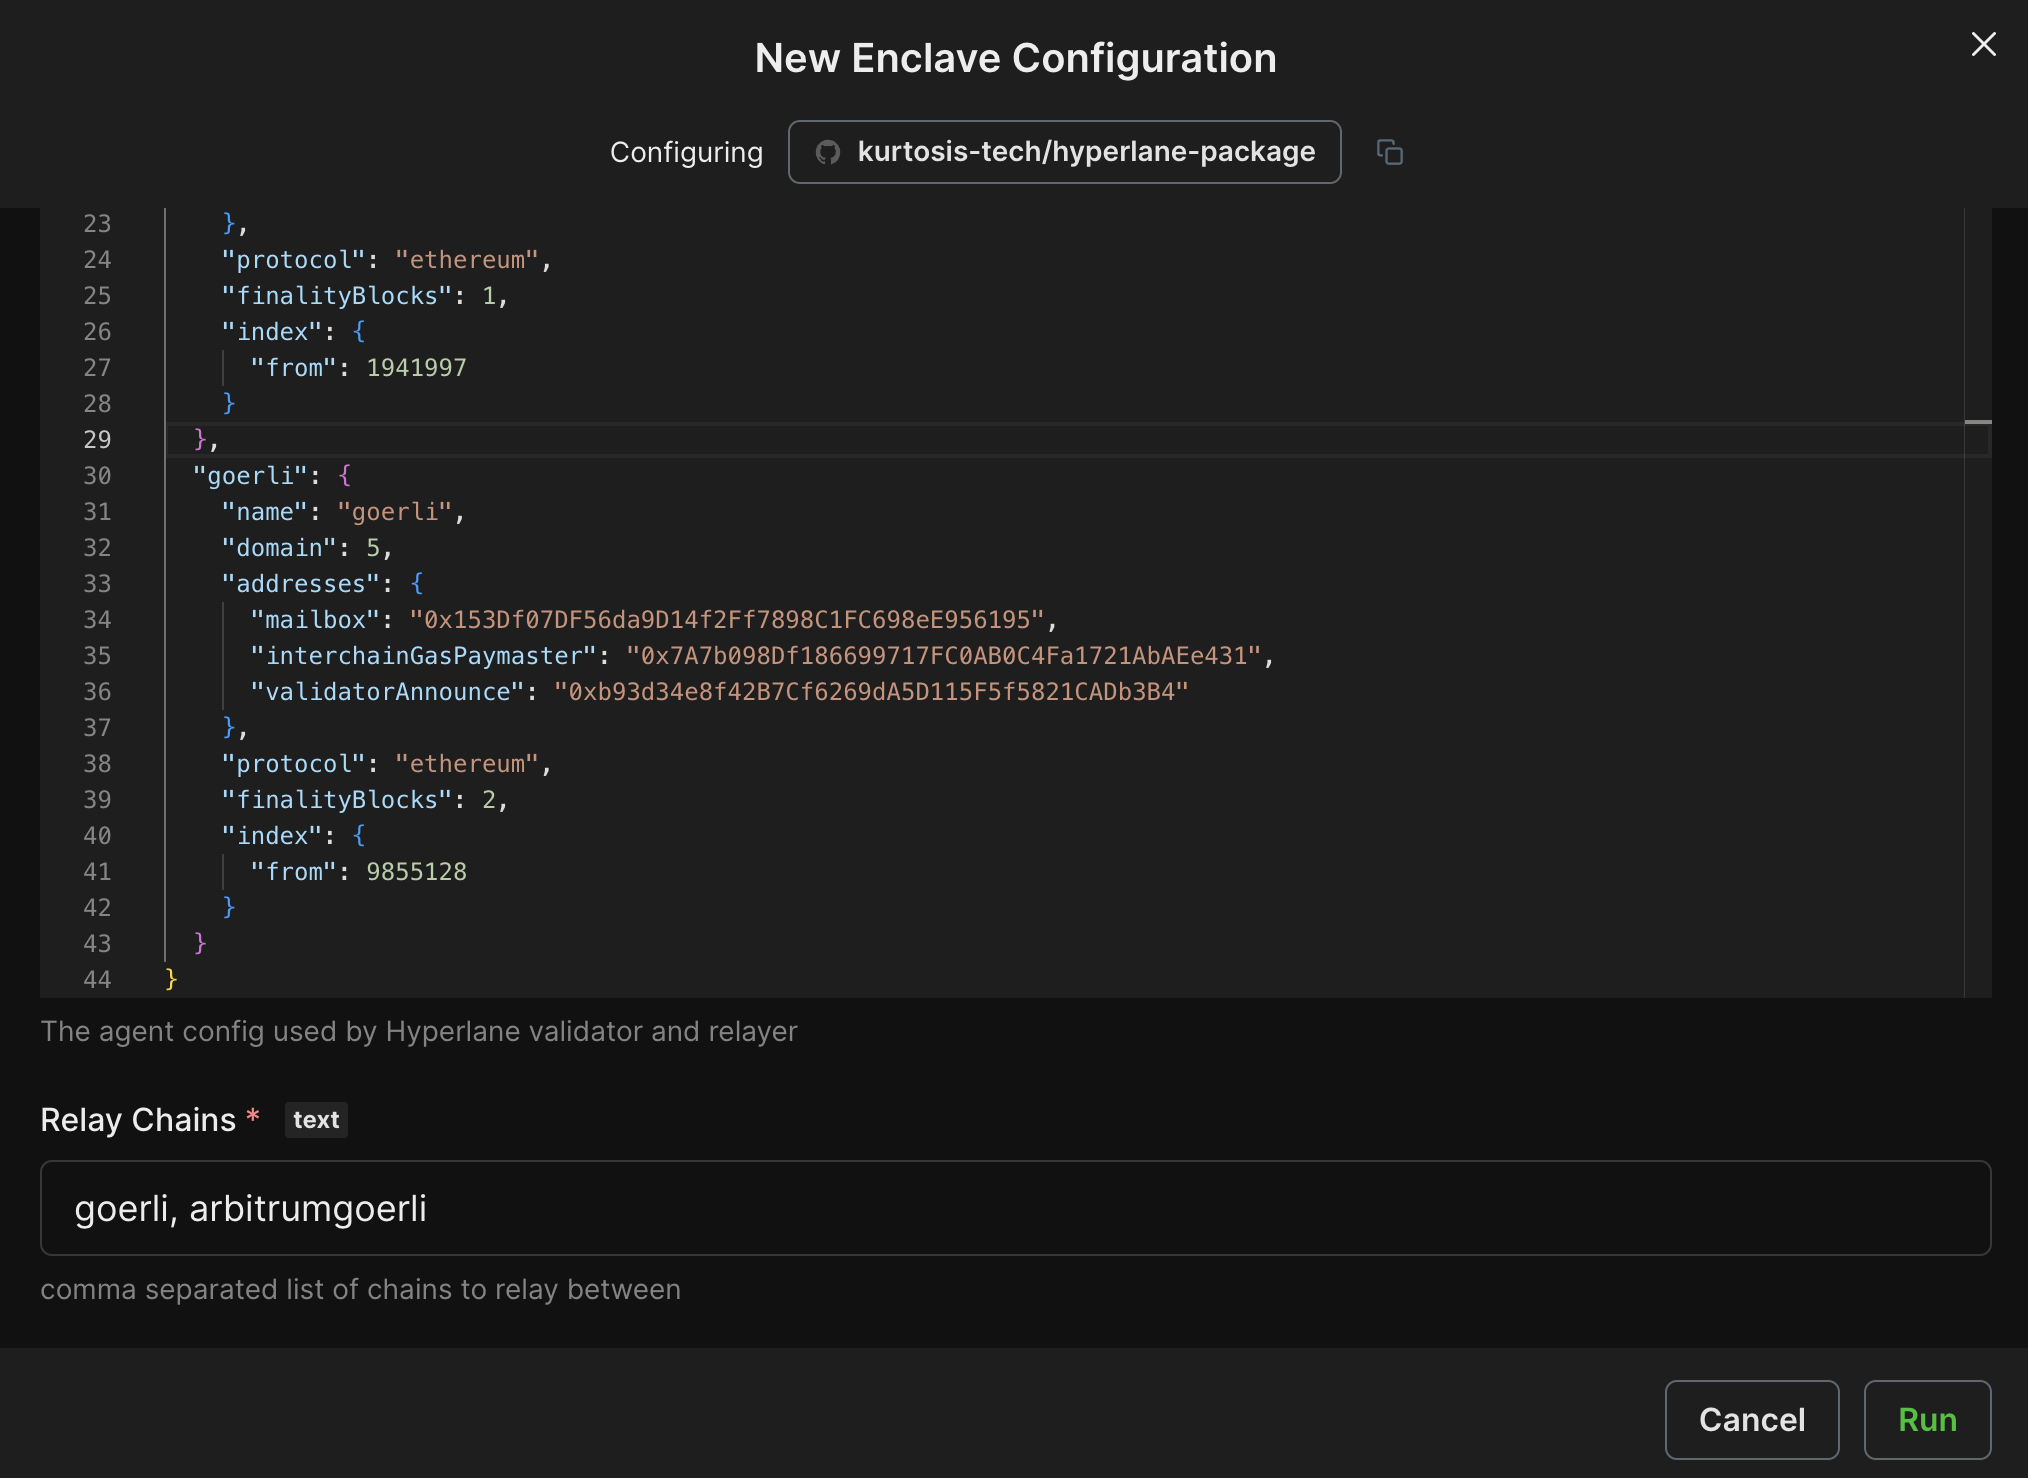
Click Run to deploy your relayer and validator!
Once the configuration finishes executing successfully, you'll see a green check mark. Congratulations! You've now deployed your own relayer and validator with Kurtosis!
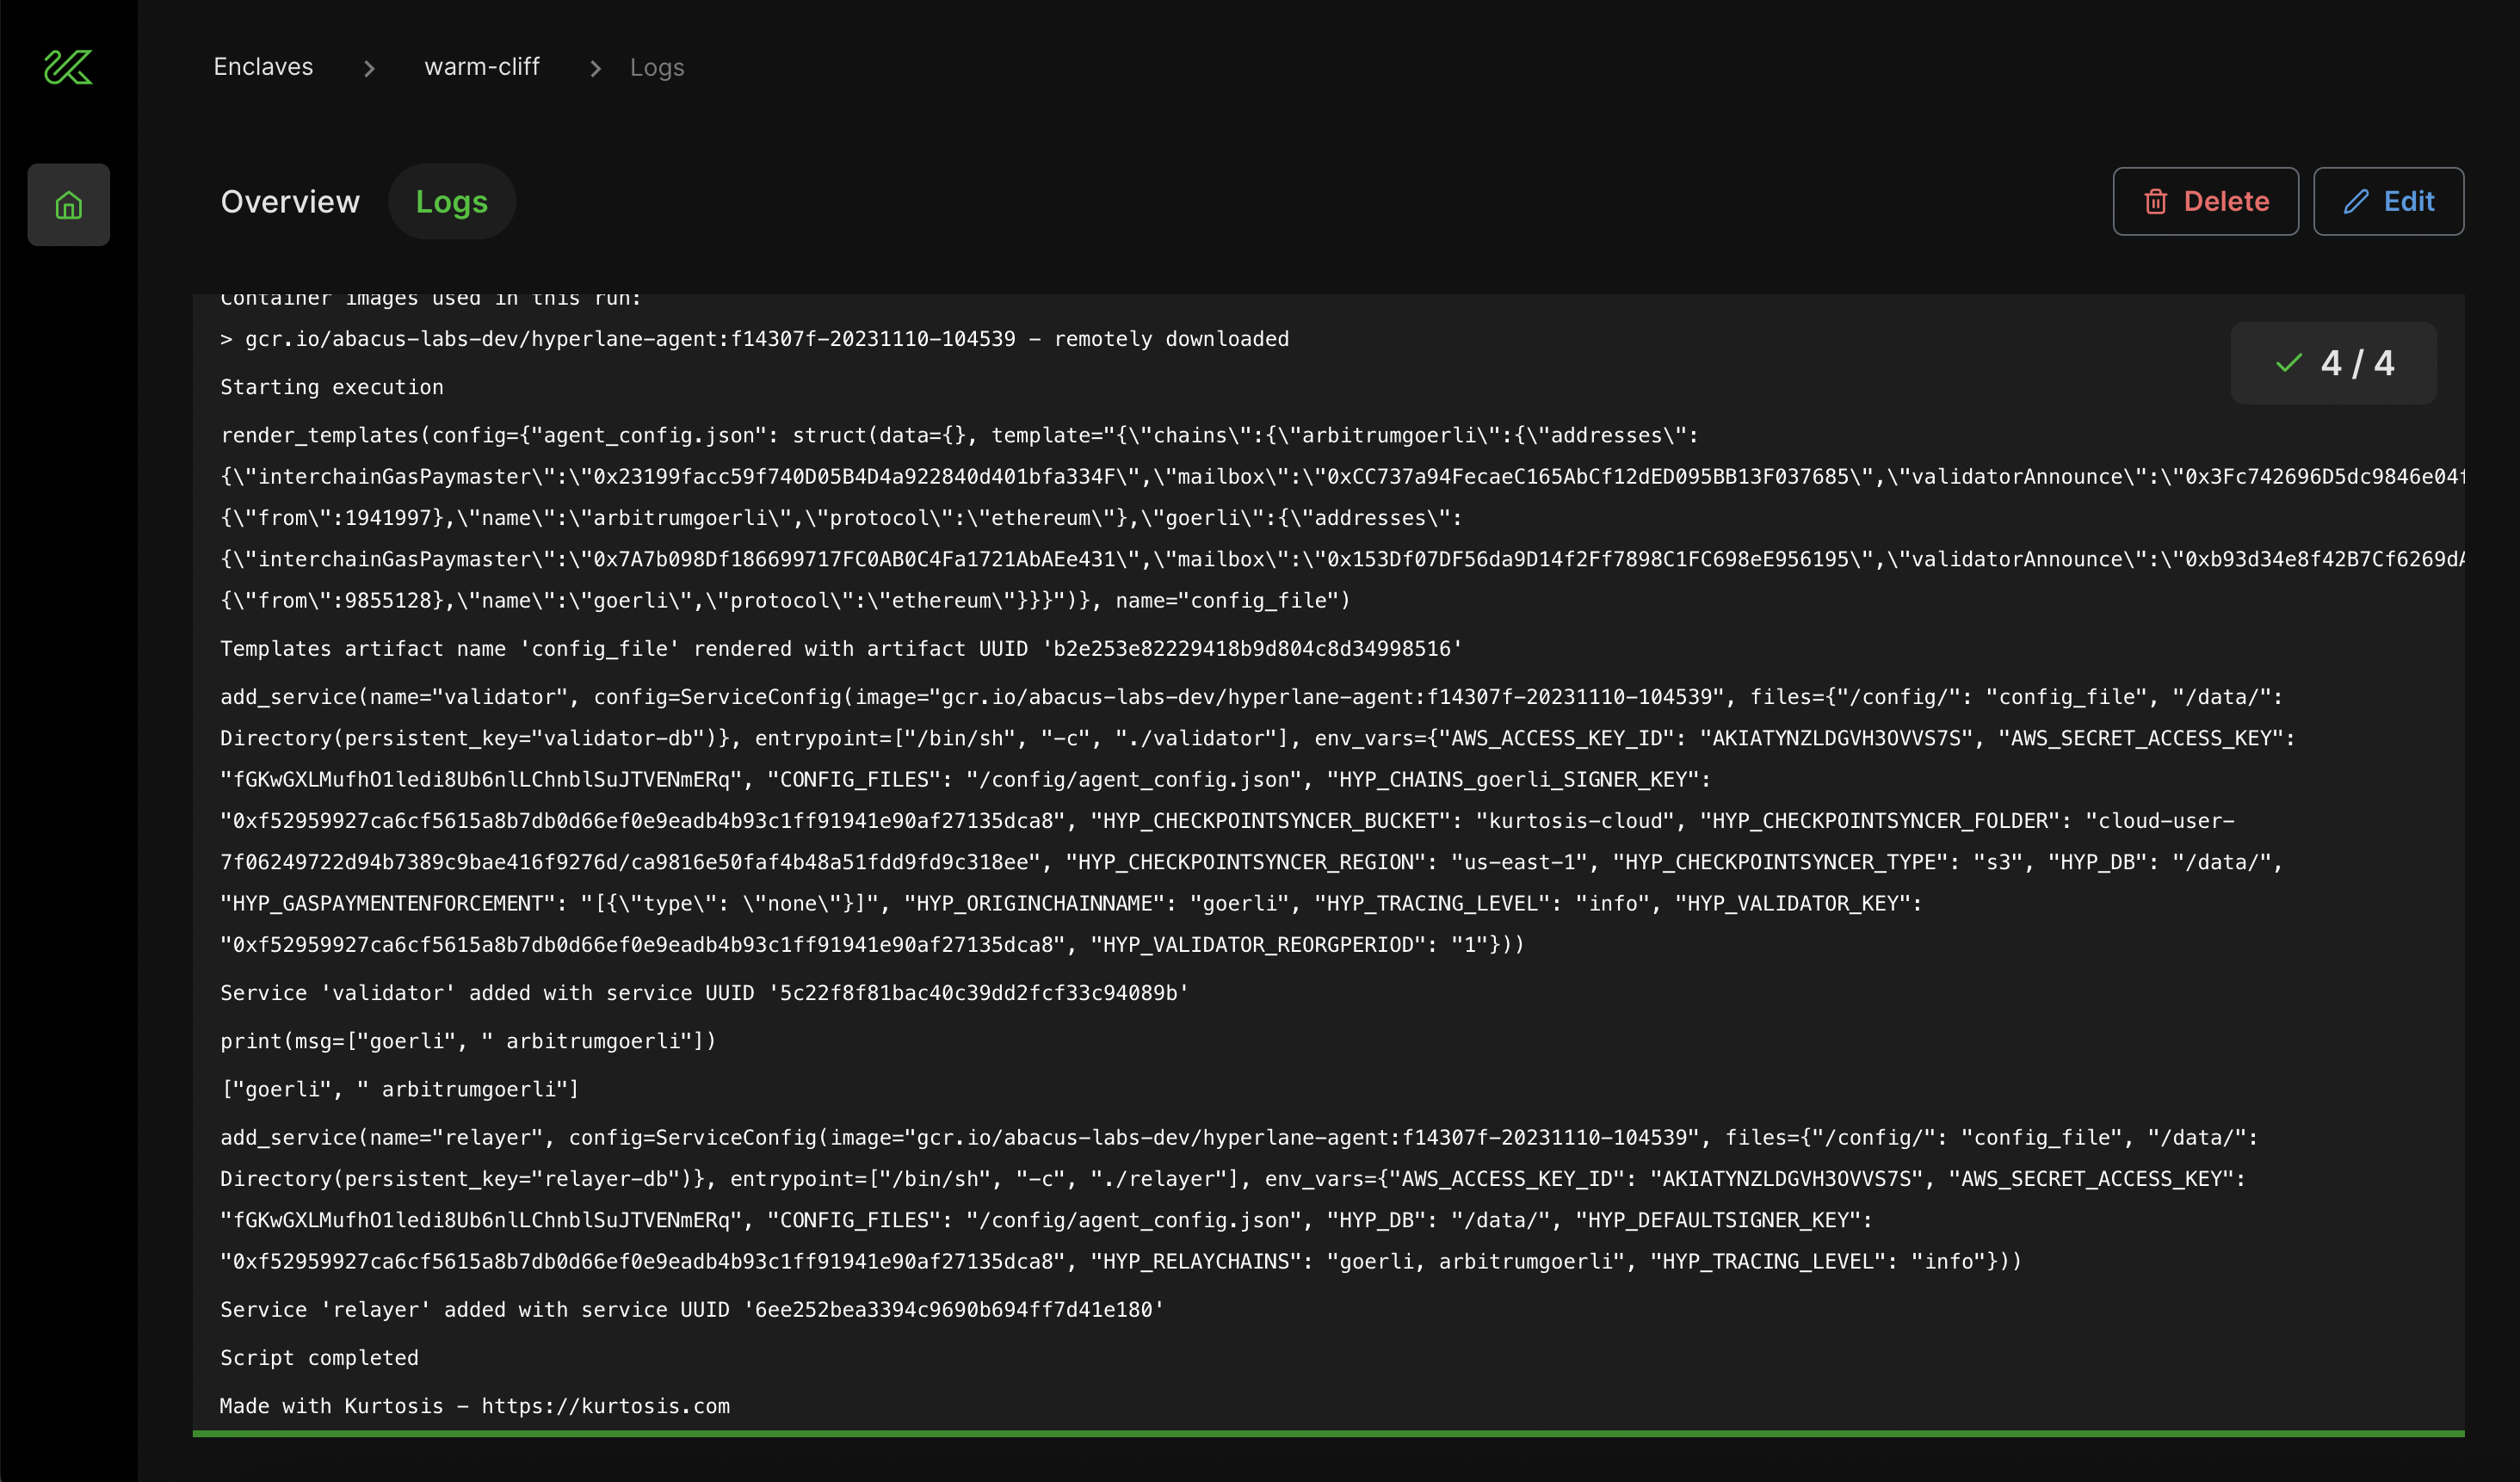
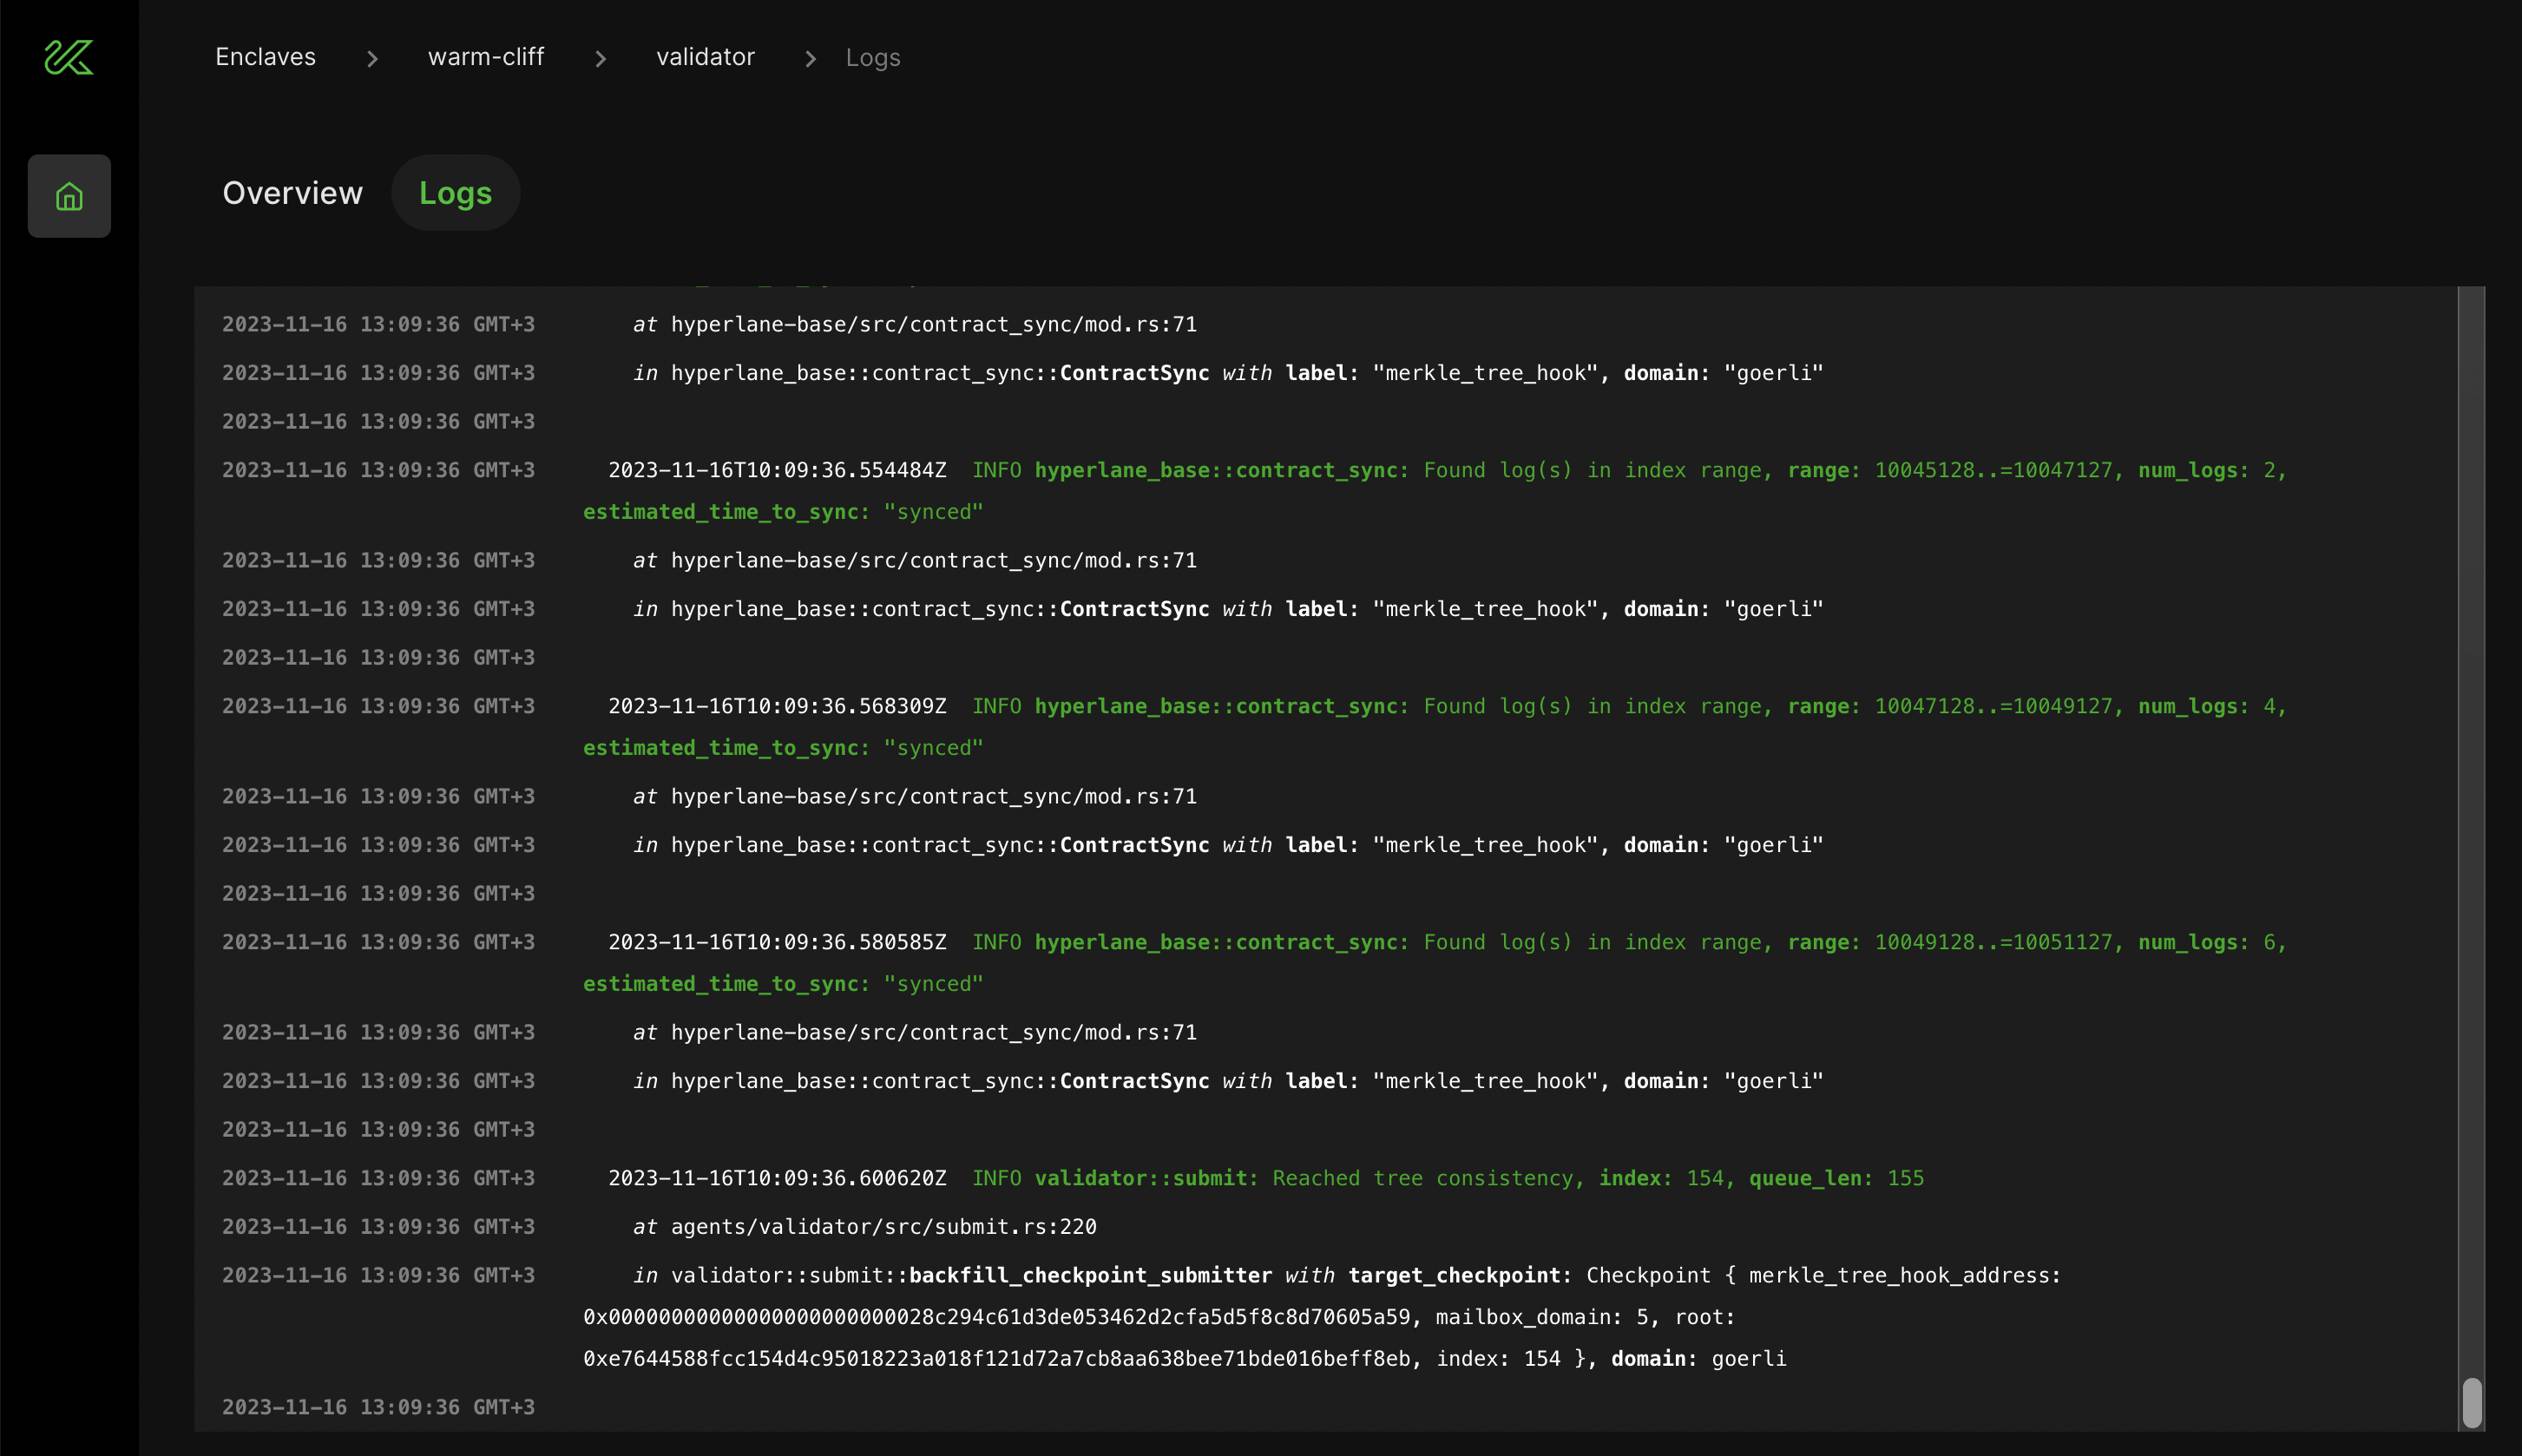
You can see information about your relayer and validator deployment, including logs, by navigating to the Overview tab.
For issues with Kurtosis, please file an issue on the Kurtosis Github repository. For questions or discussion, use the Github Discussions section of the Kurtosis repository or visit the Kurtosis Discord server.
Kurtosis offers a one-month free trial of Kurtosis Cloud for running your relayer and validator, but when your trial expires you'll need to add a payment method to continue running your Hyperlane deployment. View subscription prices here and payment method information here.
You can also run the validators and relayer yourself by following the Operate section of the docs.
4. Send test messages
You can check everything is working correctly by sending a test message between each pair of chains.
Use the Hyperlane CLI again to send the message. The CLI will ask for a set of core deployment artifacts to use. Select the core-deployments JSON file from Step 2.
hyperlane send message --key $PRIVATE_KEY
The send message command will inform you when the message is dispatched. After a short wait, a confirmation of delivery will be displayed. If the message delivery times out, it is likely that there's an issue with the Validator or Relayer setup in steps 3 and 4 above. To troubleshoot start by looking at the origin chain relayer logs. If you need further help, reach out on Discord.
Deploy a warp route
Once messages are being delivered, you can optionally deploy a Warp Route. Warp is toolkit for permissionlessly bridging tokens between any chains. The routes can use native currencies (like Eth), or ERC20 tokens (like USDC).
To begin, create a new route config.
hyperlane config create warp
Next, you can deploy the route. As before, the CLI will prompt for a core deployment artifacts file.
hyperlane deploy warp --key $PRIVATE_KEY
Once finished, the CLI will create two new JSON artifact files: warp-deployment and warp-ui-token-config. The first contains just addresses for the newly deployed warp router contracts. The second is a config file for the Warp UI, which you can use for the next optional step.
Deploy the warp UI
The Warp UI is a DApp template for interacting with Warp Routes. You can clone the repo at https://github.com/hyperlane-xyz/hyperlane-warp-ui-template and follow the instructions in CUSTOMIZE.md to configure and a new instance. In short, use the chains.yaml and warp-ui-token-config.json files from the previous steps to provide the UI with the information it needs.